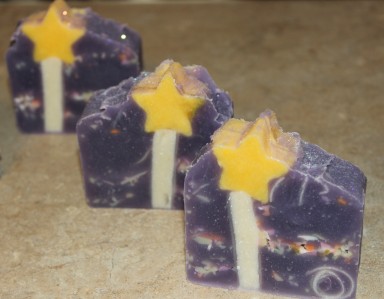
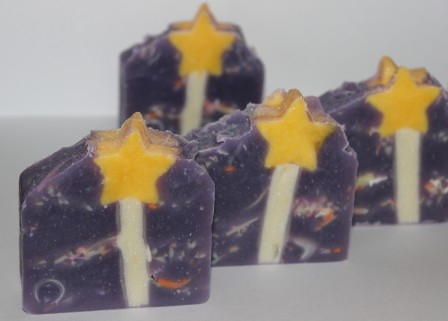
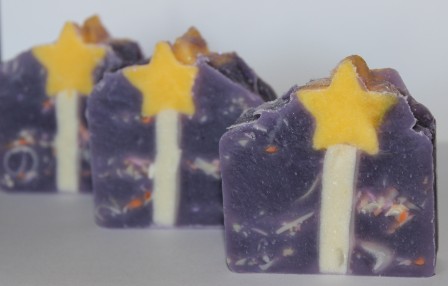
It’s that time again: Soap Challenge Club time! This month’s creation was to include embeds in cold process soap. After nearly two years of soap making, I’m slightly embarrassed to admit that I’ve NEVER added embeds into any soap! I’ve been collecting different silicone molds for quite some time, planning out lovely soaps with embeds all the while in my head. There are just so many different techniques to try and only so many hours in a day!!! Thank goodness for Amy and her challenges, or I might never try some of those things that I’ve intended to do. Deadlines and group accountability are two things that motivate me well!!!
So here’s the result.
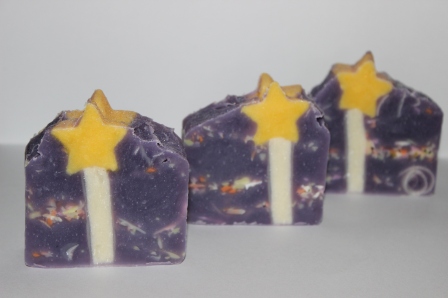
Pixie Dust soap (version 2.0) was born simply because I needed to restock that scent! (Here’s what version 1.0 looked like, also from a club challenge!) I have several young girls who love it, and I wanted to make a new design that was specifically for them. I bought some star ice cube silicone molds just after the 4th of July on clearance, and I thought they’d be perfect on top of a magical fairy wand.
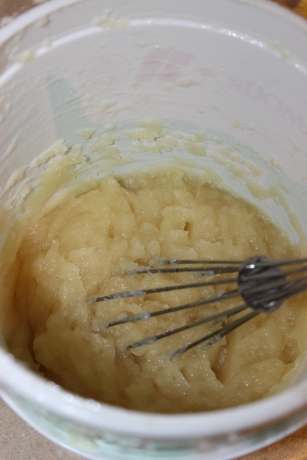
I began by making embeds using the microwave hot process method that Amy showed in her awesome-as-usual tutorial. I used a one-pound recipe and a tall plastic container, carefully stirring the soap after 2 minutes of half-power heating, and then after another 2 minutes of heating. I’m glad that I didn’t walk away, because the soap started to volcano after just one more minute of heating! I stirred it down just before it bubbled out all over my microwave, then heated it for about 45 more seconds when it bubbled up again. At that point, it looked like soupy applesauce, so I continued to stir it until it cooled and began to come back together.
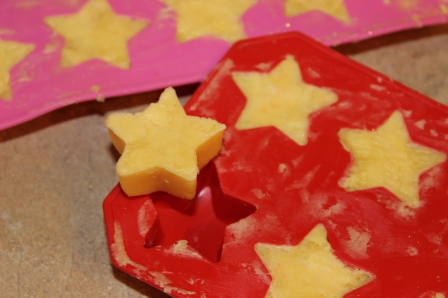
After about 7 minutes of stirring and at about 160 degrees, I split off half of the soap, stirred in neon yellow colorant with gold mica, and added some fragrance. It was messy, but I pushed the yellow soap down into the star molds, filling them as best as I could. Then, I colored the remaining soap white and mushed it into the bottom of a long wooden mold, the same one that I would later use to make the final soap.
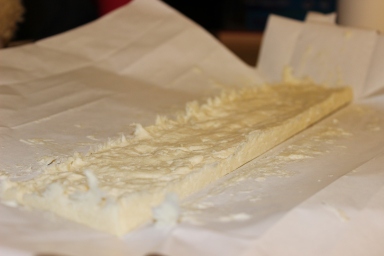
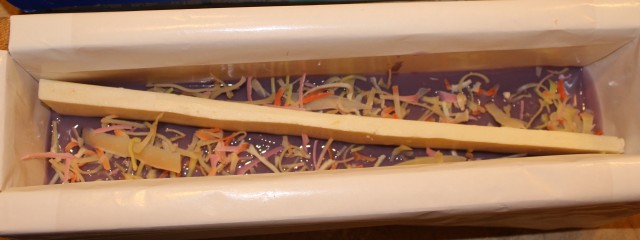
Once this piece hardened, I trimmed it up a bit and used it turned vertically to create the handle of the fairy wand.
After only a few hours, the hot process soap was cooled and hardened enough to remove it from the molds. The silicone star molds worked amazingly well!
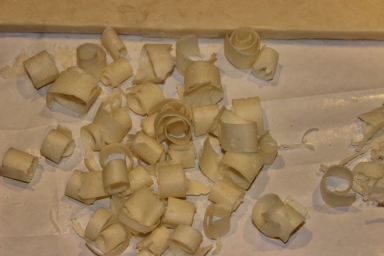
I made a few soap curls from the white trimmings, and I also chose some pink, orange, and yellow scraps out of various recent soap trimmings to use in the final soap.
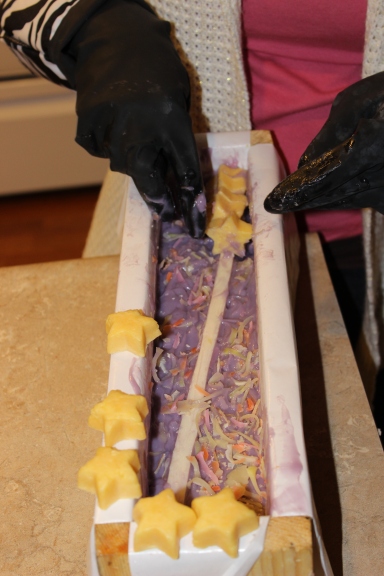
Later in the same day, I made the remainder of the soap using my regular nourishing recipe and adding in yogurt. I turned the soap a lovely shade of deep lavender. I thought the bright pinks, oranges, and yellows would really stand out, creating some fun “pixie dust” colors! After adding a bit of purple soap to the bottom of my mold, I put in the white wand, then began adding soap scraps and curls followed by more purple soap and repeating.
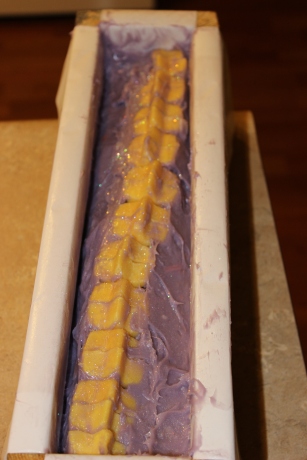
When the new soap reached the top of the wand, I stacked the stars down the length of the mold along the top of the white column.
My only issue was that I didn’t quite make enough new soap! I ran out of purple and had to pile it up around the stars to get them to stay put. Plus, the purple soap was extremely set up at that point. Simply put, I made a magical mess! I spent a long time tamping the mold and pushing soap down, trying to eliminate as many air bubbles as possible. I finally gave up and sprinkled on some glitter. Can’t have a pixie dust soap without glitter!
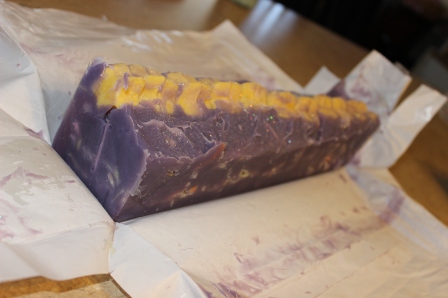
Boy, that top looked messy. Unmolding the soap the next morning was a bit scary. I did find many air pockets, but mostly small ones.
This is certainly not the prettiest soap I’ve ever made, but it’s not the worst either! The soap scraps and swirls make this whimsical and fun, and the color combination is quite girly. My triplets were ooh-ing and aah-ing over the stars and glitter as I was cutting it. It was hard to explain to them why they couldn’t use the soap yet! That curing time is such a kicker!!! I completely understand their disappointment. Don’t all of us soap makers feel that way?! Waiting for soap to cure is probably the hardest part of the job!
Overall, this soap came out reasonably well. I figured out that next time, I’ll mix the soap scraps directly into the new soap before adding it to the mold. I’ll also make more soap than I think I’ll need just to be sure I have enough!
Now that I’ve finally made a soap with embeds, I’ve got to get on with it! I have so many cute molds to try out, and so many ideas. And did I mention the piles and piles of ends, scraps, shavings, and uglies that I’ve been storing? So many possibilities. So little time. Thanks, Amy, for another great challenge!

