What do you do when it’s below zero and snowy outside? I can’t think of anything more fun than making soap! Well, actually, traveling to some exotic and WARM location might be more fun…but if I have to stay home, soap it is!! So this month’s Soap Challenge Club was a welcome activity. I’ve done the Taiwan Swirl many, many times, and the results are always beautiful. (You can see some previous Taiwan swirls here and here.) But I always free-hand pour the soap that I swirl, and I only pour the soap one layer thick in a slab mold. This Circling Taiwan Swirl soap really did present me with challenges!
First of all, I don’t have dividers for my soap molds. I made some dividers out of foam board and covered them with packing tape in hopes that the soap would easily slide off of them. I also made them to fit very tightly in my molds, with hopes that they’d stay put as I poured the soap. I was wrong on both accounts! And furthermore, because I had to cut the edges and tape them up, they weren’t perfectly straight edges that sat flush on the bottom of the mold, so some soap seeped through as I poured. In fact, nothing about the dividers was truly straight! Take a peak:
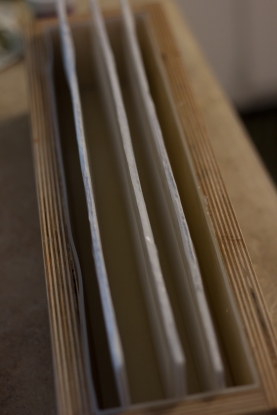
Clearly, these dividers are far from perfect!
Overall, the dividers were my nemesis in this challenge! I’m sure that the lovely (and straight!) dividers that you can purchase are probably well worth the cost if for no other reason than to avoid all the frustrations that I had.
My next challenge was the universal soap-making challenge: trace. I was testing out 3 new recipes (which I realize is not the brightest idea when making a challenge soap). I found that my recipes probably contained a bit too many hard oils and butters, and probably too much castor oil, so all 3 recipes set up really quickly. I was scrambling to get the soap colors mixed and poured quickly, and then I fought my silly dividers like crazy! Even with blending the oils and lye at 85 to 90 degrees and only blending to emulsification, the soaps were still thick by the time I finished pouring them.
Soap #1: Lavender Fleur fragrance oil from thesage.com with titanium dioxide, lavender oxide, black oxide, and green mica as colorants. I also added lots of goodies like yogurt, colloidal oatmeal and silk to the batch.
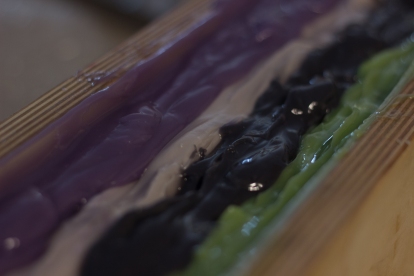
Yikes! SO THICK!
By the time I poured the soap and fought the dividers, it was difficult to swirl the soap. I started out with a skewer to create the first swirl, but then switched to the handle of my plastic spoon to circle around the outside.

It was so thick that it didn’t swirl much.
Soap #2: Black Raspberry Vanilla fragrance oil from Nature’s Garden with titanium dioxide, red mica and lavender mica blended, and black oxide, also with yogurt, colloidal oatmeal and silk. This fragrance typically gives me lots of time to work with the soap, but I fought the dividers again and ended up with thick soap. I used my spoon handle to swirl the entire soap this time.

Another thick soap that didn’t swirl as much as I’d have liked.
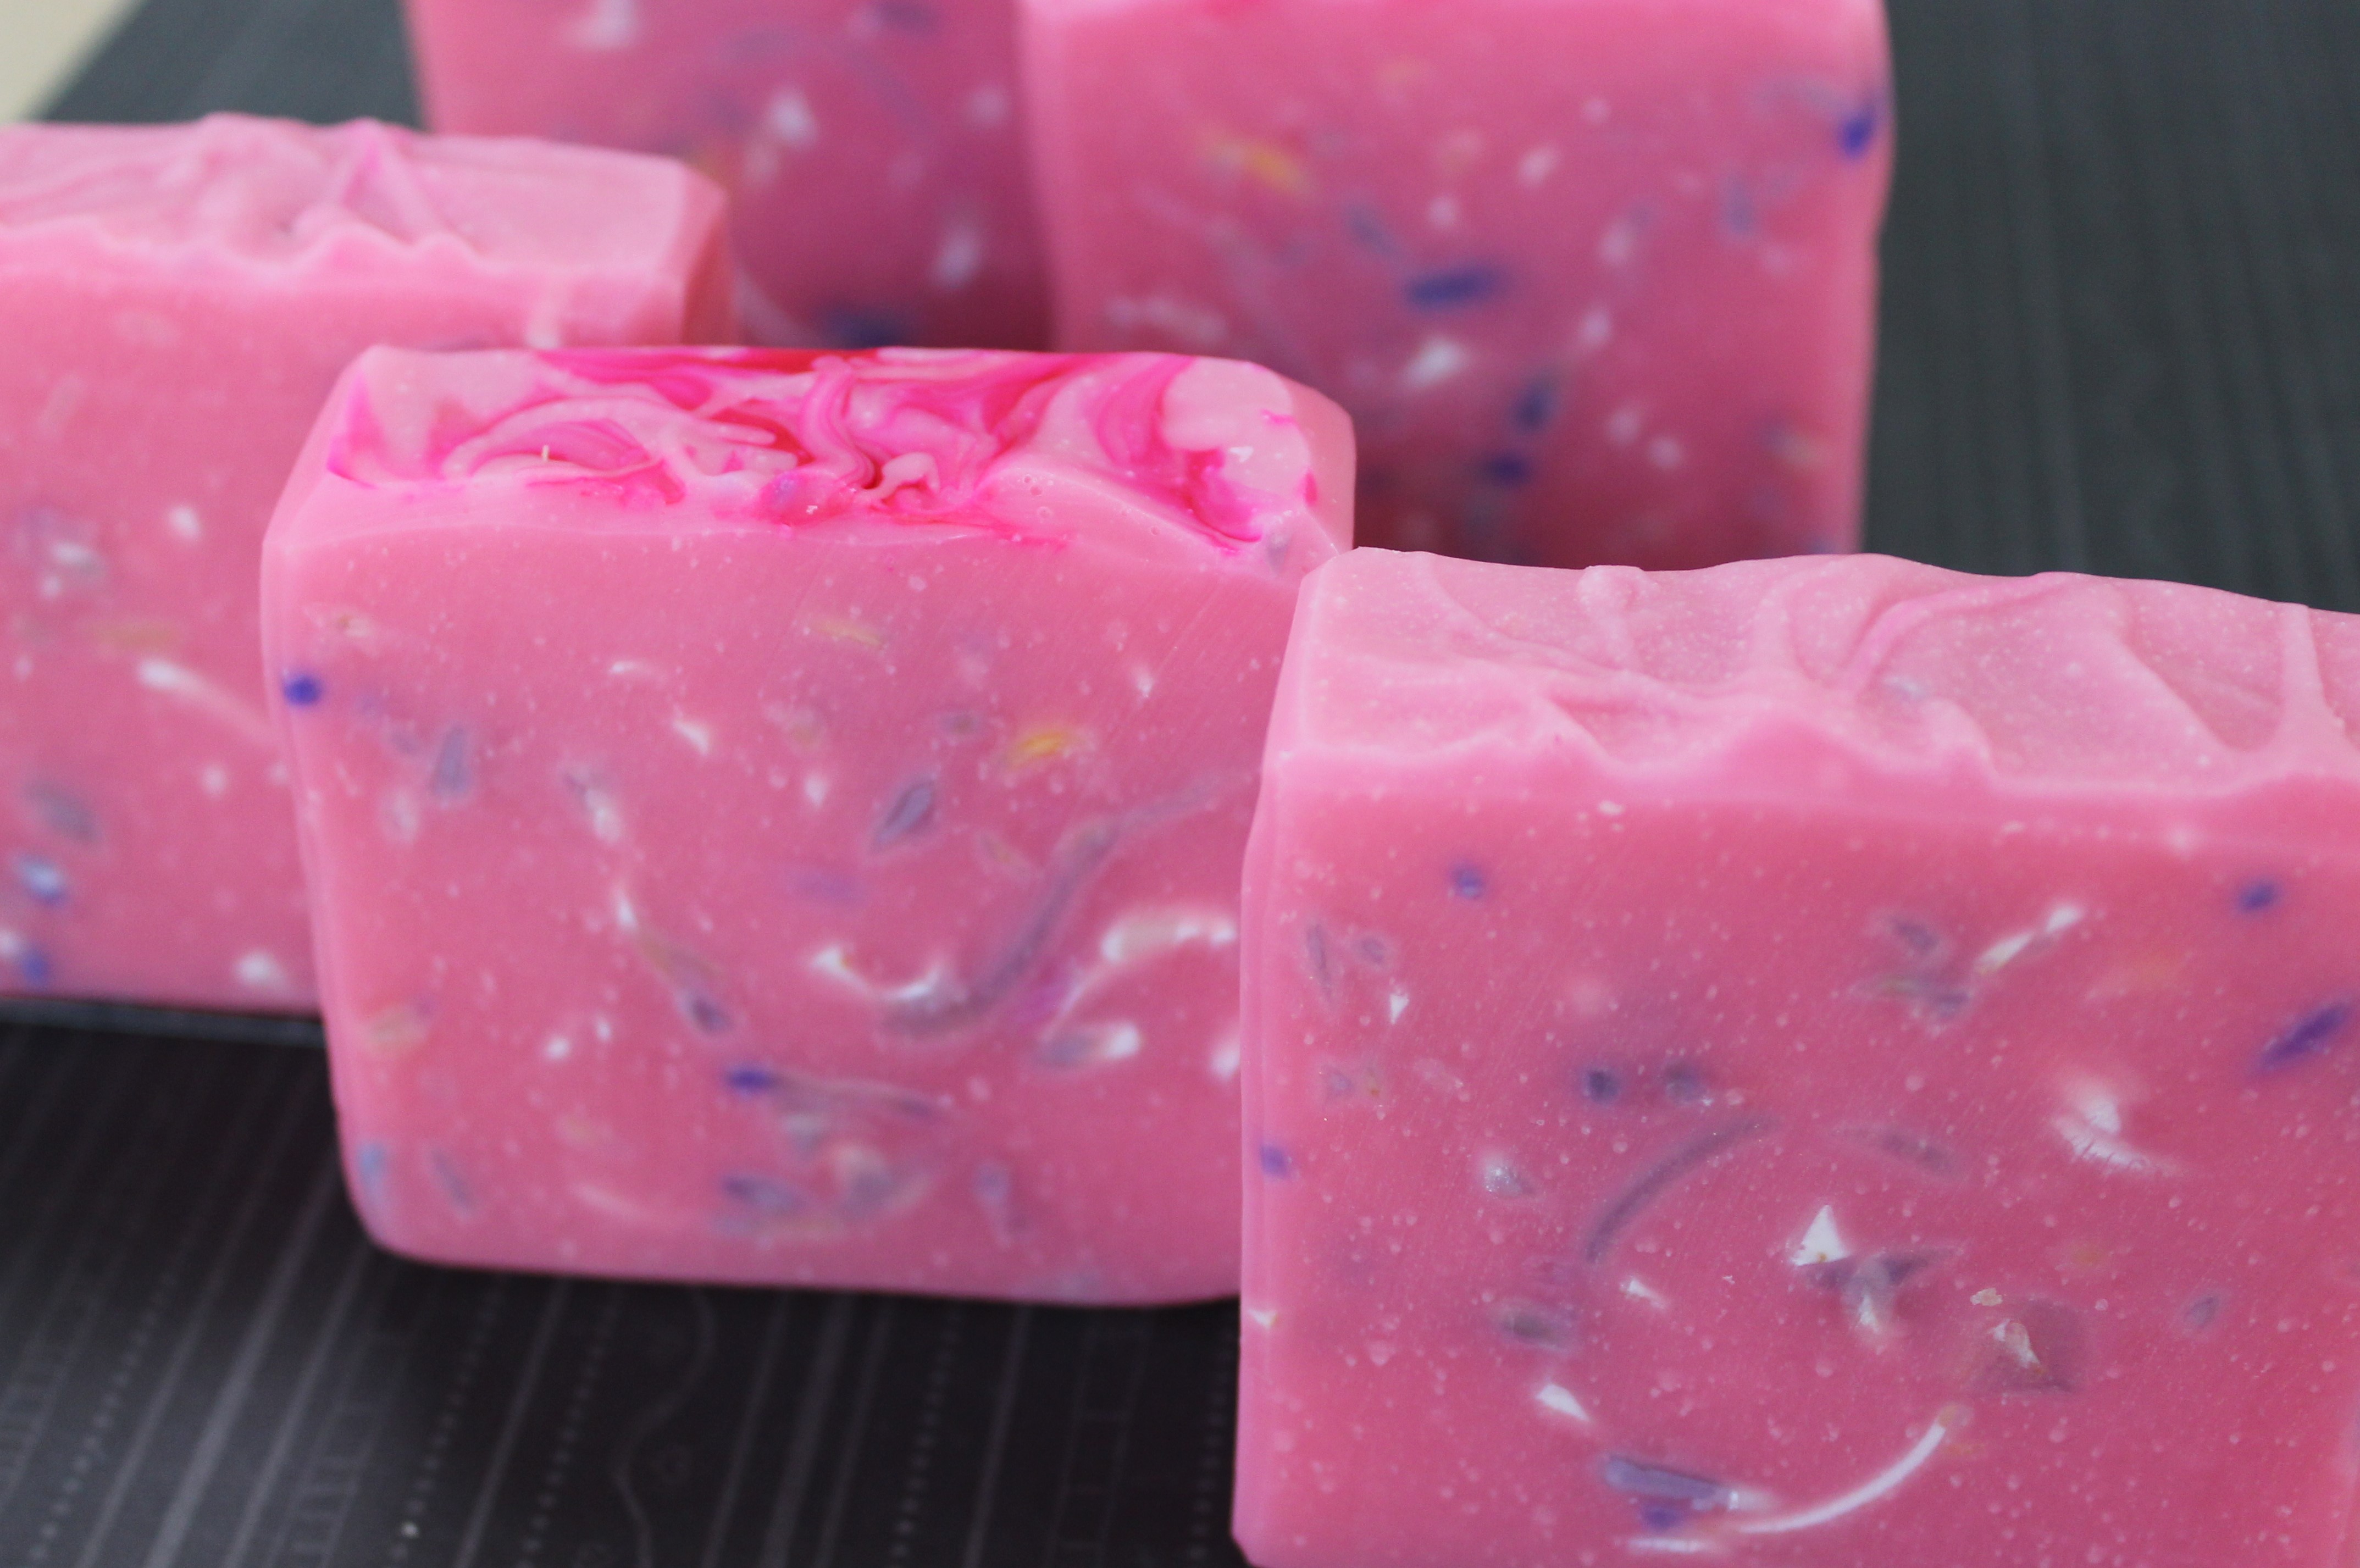
Soap #3: Pixie Dust fragrance oil from thesage.com with Mad Oils micas in blue, pink, yellow, and purple. I included milk and yogurt in this batch along with silk and colloidal oatmeal. I added extra liquid to this batch in hopes that it wouldn’t set up as quickly, but it did exactly the same as the first 2 batches.

This soap was thick too, but I liked the swirls more here.
After these 3 frustrating batches, I gave up for the day and came back fresh the next. I decided to go with the tried-and-true slow moving recipe that Amy gave us in several of her tutorials throughout the Soap Challenge Club years. It works like a charm every time! And I love the feel of the soap after a good long cure.
Soap #4: Satsuma from Wholesale Supplies Plus with Mad Oils micas in pink, orange, and yellow as well as an uncolored stripe. I included milk and yogurt in this batch with silk and colloidal oatmeal. I still fought my dividers, but this time the soap was nice and fluid the entire time I poured. This fragrance is so incredibly yummy, and I really think it slows down trace. It’s a soaper’s dream! I used a skewer to swirl this one nice and tightly, and I must admit, it was highly satisfying to finally get one “right!”

Raw Satsuma soap with lovely wispy swirls! Yay!
I was almost dreading cutting into the soaps from the first 3 batches. I expected to find lots of air pockets since the soap had been so thick, and I didn’t know if the divider problems had wreaked havoc on the soap lines. Imagine my surprise when I cut into all the soaps and found very few bubbles and awesome results!

Lavender Fleur soap. This is the end cut with the lotus flower shape in mirroring bars.

Lavender Fleur bars from the inside of the log. The dividers did better than I thought they’d done. The stripes are very distinct!

Black Raspberry Vanilla mirrored end cuts.

These are cuts from the inside of the log. Love love love these swirls!

Pixie Dust end cuts.

The inside bars of Pixie Dust soap. These colors are so vibrant and beautiful, just like the fun and bright fragrance.

Satsuma soap end cuts. Because this soap was much more fluid, the swirls are more feathery and there are more petals to the flowers.
Even with all of the frustrations, I am so happy with how these soaps turned out. After cutting them, my challenge has been with which one to choose to enter! I’ve settled on this soap:

Black Raspberry Vanilla Lotus Soap Challenge Club entry!
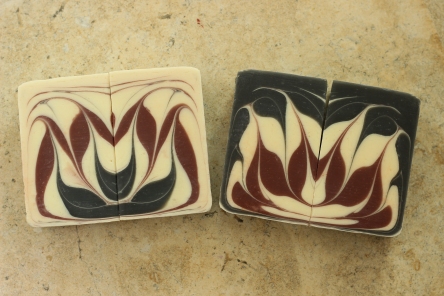
The contrast of these soaps was my final deciding factor. The colors really pop, and the white flower on the black background is just really pretty.
Which one is your favorite? I made myself wait to look at everyone else’s soaps until I submitted my entry, so I’m excited to see the beautiful soaps! I’m guessing there will be lots of stunning results. I’ll definitely be making more soaps with this technique (after buying some good dividers, that is)! Thanks to Amy and everyone else who helped with this challenge technique. It was so much fun!!


")
")


