Cosmic Wave Soap Challenge

Once again, we’ve had a great Soap Challenge Club tutorial this month thanks to Amy Warden of Great Cakes Soapworks and her guest instructor, Tatsiana Serko of Creative Soap by Steso. The Cosmic Wave technique proved to be a good challenge that I found to be quite fascinating too. When I’ve done in-the-pot swirls in the past, I’ve noticed that at times there are some really cool “cosmic” lines that appear, and I’ve never been able to pinpoint why. Now I know! When the perfect thin trace meets the perfect slow pour at the perfect low height in the mold, voila! Cosmic waves!

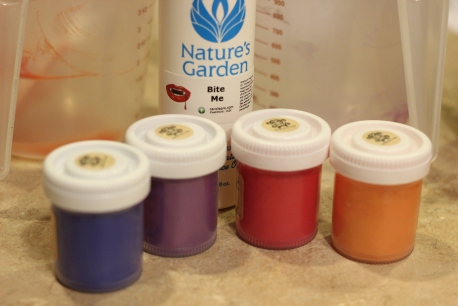
As instructed, I used a great slow-moving soap recipe of 35% olive oil, 30% lard, 25% coconut oil, and 10% rice bran oil. It’s the original slow recipe that Amy shared a few years ago when the club was just starting, and I love the soft feel that the soap produces. I also added some skin-loving goodies like colloidal oatmeal, goat milk, and silk to this soap, as well as 1 teaspoon sugar per pound oils to the lye solution to help give a bubblier lather. (Some soapers also tout that adding sugar helps to keep the soap from moving too quickly. I’m not sure if that’s true, but I’ve never found that adding sugar speeds up trace, either, so I’ll go with it!) My fragrance of choice was Lavender Fleur, a lovely feminine fragrance that doesn’t accelerate or discolor the soap. White was my base color, and I used Grape Nehi mica and The Maniacal Pea mica from Mad Oils as well as some black oxide for good contrast colors in my “waves.”

img_3427

Soap colors prepped and ready to do in-the-pot swirling before making cosmic waves!

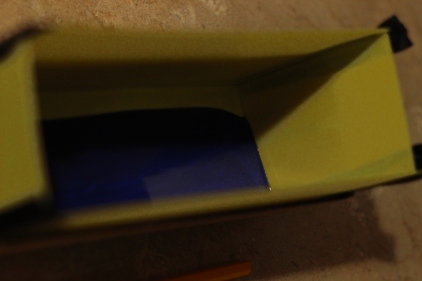
My oils and lye were at about 80 degrees when I blended them, pulsing quickly just a few times and mostly stirring by hand to get a good emulsion. I poured off a total of 15% of my soap into the 3 different colors (in cute 5oz. owl Dixie cups). Then, I blended titanium dioxide into the main soap bowl with another few pulses of the stick blender. This brought my soap to the perfect thin trace. I poured some white into a smaller measuring cup, then poured thin lines in a grid pattern with each of my colors.

img_3429

My soap was still a little thin for the in-the-pot swirls at first, but it worked!

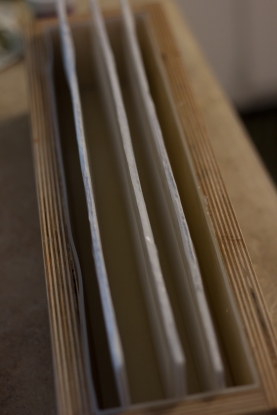
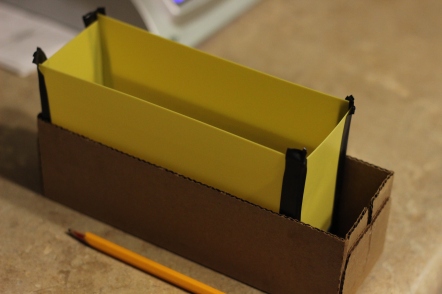
Then came the fun! I poured the soap into my 9-bar Birchwood slab mold from Bramble Berry. The key was to pour very close to the mold, very gently, moving the cup of soap very slowly down the length of the mold. The soap kind of folds softly into the mold creating zig-zagging lines and waves.

img_3432

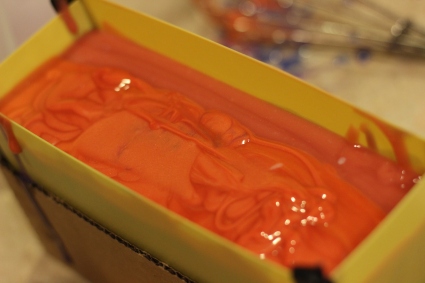
These waves are looking pretty cosmic after the first few passes!

It’s so cool! I repeated this process several times until all of the soap was gone.

img_3434

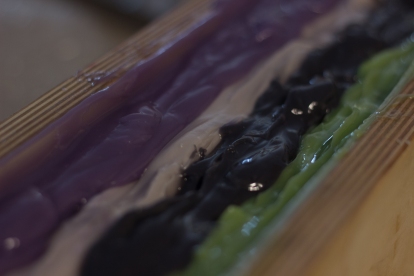
Aren’t those lines so cool?! You can see here how the soap really remained fluid throughout the pouring. That slow-moving recipe is magical!

I attempted to spin the mold a bit to make the waves even wavier, but I found that the soap was still so fluid that it made the edges begin to get muddy! Adding the dividers displaced the waves just a bit as well, but I still found several fun lines in each bar. Check it out!

img_3440

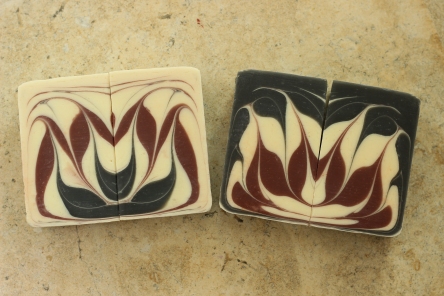
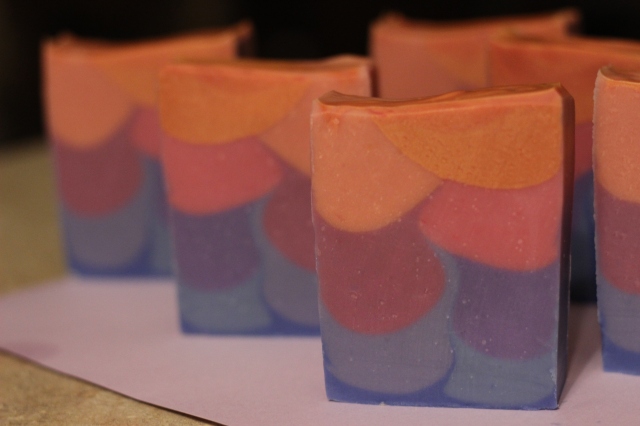
Lavender Fleur cosmic waves!


img_3438

The middle bar looks pretty good, but you can see the muddied outer edges of the other bars.

I found that the white soap at the bottom of the pot became a bit muddy toward the end of each pour. In fact, there was a lot of white and muddied gray soap toward the very end, and I’m a bit disappointed with the final pour that came out. I should have reserved a bit of colored soap to add to the pot just before finishing the pour. Live and learn! Now I know for next time. And there WILL be a next time!!

img_3443

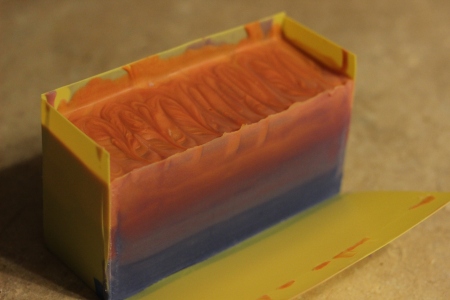
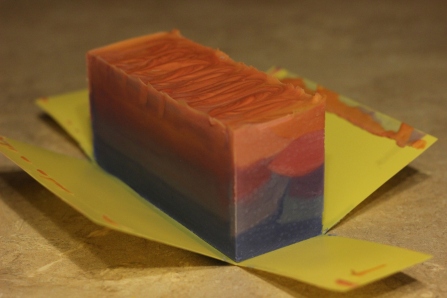
This Lavender Fleur soap turned out pretty cosmic! All of the waves are different, and I love how the dividers pulled the lines down the sides of each bar too!


img_3453

Even the edges are cosmic!

These soaps are each so interesting and artistic. They’ll change design with each use, exposing more cosmic waves with every exposure to water. Super fun to use, and they smell divine too!

img_3451

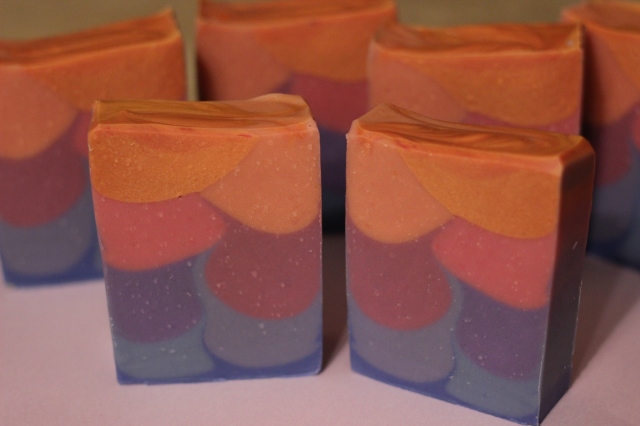
Lavender Fleur soaps

img_3450

I love the swirl at the top of the bar on the right! I think that occurred when I spun the mold a bit.

I love this simple yet challenging technique, and I’ll definitely be doing it again. I appreciate that Amy gave us links to several variations of the technique at the end of the tutorial. I have a notion to try them all! Thank you to Amy, Tatsiana, and all of the fabulous soapmakers who participated in this challenge. I’ve learned a lot (as always) from everyone, and I have such fun watching the making-of videos, reading through blog posts, and browsing Facebook albums and Instagram photos. It’s such a joy to participate in these challenges!

And speaking of joy…may I introduce my newest joy?!

img_3348Noah was born just 3 weeks ago! What a blessing he is. His sisters love him to pieces, and I can’t keep that mass of brown hair clean thanks to all of their sloppy kisses on his head! We are officially seven messy babies at my house!

Wood Grain Soap Technique

Howdy, soapy friends! It’s been a while since I last participated in the Soap Challenge Club (and I have a good reason, I promise!), but I couldn’t resist participating this month! The wood grain technique in soapmaking is just so cool! Soap that looks like wood!?! And multiple ways to make it look real!?! Amy shared a pretty simple technique in her tutorial this month, and she also compiled several YouTube videos of other soapmakers’ different techniques. I chose to try out Amy’s squeeze bottle technique for the challenge, but I’m looking forward to trying out several of the other techniques in the near future as well.

I recently had a friend ask me to make Sandalwood soap with activated charcoal, and this provided me with the perfect opportunity to create! I used a very sexy Sandalwood fragrance oil, along with cocoa powder and activated charcoal as colorants in a very slow-moving recipe that Amy shared a few years ago inside the club: 35% olive oil, 30% lard, 25% coconut oil, and 10% rice bran oil.  I also added silk, goat milk and colloidal oatmeal to this luxurious soap. Working at room temperature with this recipe gives me the most time; my soap batter was fluid throughout the squeezing! SCORE! (I’m a bit overly excited because I have never had much luck with squeeze bottles.) I blended the oils and lye just to emulsification, and then I divided the soap evenly into 5 squeeze bottles. I added different ratios of cocoa powder to 2 bottles, charcoal to one bottle, a combination of cocoa and charcoal to one bottle, and I left one bottle uncolored.

img_3176

Squeeze bottles shaken, not stirred. 😉


The Bramble Berry 9-bar slab mold was the perfect choice for this technique. I was able to squeeze lines of each color over and over again down the length of the mold to create that wood grain look.

img_3182

My squeezing got a bit messy towards the end!

When all of the soap was squeezed in, I used a skewer to follow those lines, then I swirled at least one “knot” where each bar would be.

img_3188

I might have gotten a little over-zealous with the knots… but it’s just so fun to play with soap!!

I added in the handy dividers that came with the mold and sprayed the top with 91% alcohol.

img_3191

Dividers in and ready for bed!

img_3196

I am so excited about this soap!


img_3199

Even the backs/bottoms and sides of the soap look cool! These bars will have a new design with every use!

img_3198

The wood grain technique is awesome!

It looks amazing and smells amazing.

img_3201

I’m certain the men in my life are going to love the looks (and smell) of this new soap.


I’m going to try out a few of the other techniques as well, like making soap in a log mold with a “bark” edge! How fun, especially for the upcoming winter season! I’m thinking maybe a crackling birch fragrance, or a lovely evergreen scent.

I am continually impressed and inspired by all of the fabulous, creative soap makers out there. This is such a fun craft!! Thanks, Amy, for another great tutorial, and thanks to Kenna of Modern Soapmaking and Anne-Marie of Bramble Berry for sponsoring this month’s challenge.

And because I just can’t resist, I’ll let you know what’s up in my life that’s been keeping me from posting this summer…I’m PREGNANT…AGAIN!!! We’re only days away from becoming a family of SEVEN MESSY BABIES!!! And you’ll never guess…20160520_182208

Our girls are ecstatic! God is GOOD! Have a blessed day, friends!

The Teardrop Soap Challenge

The Teardrop, this month’s Soap Challenge Club technique, was so appropriately named since it caused so many of us soapmakers to cry! Holy moly, was this a tough one (for me at least)! Amy gave us a lovely tutorial, and she warned us that we had to find that “Goldilocks” consistency of soap…but it was completely elusive to me.

So here’s the technique in a nutshell: Make a soap batter that is slow moving, and get it to barely light trace. Pour off about 10% of the soap into different contrasting colors. Pour about a third of the main batter into the mold, then very very slowly, pour the colors down the center of the mold, one after the next, creating stripes that should spread over the first layer. Then, pour the main batter simultaneously down both sides of the mold to essentially squish the colored stripes into the shape of a teardrop in the center that climbs toward the top of the mold. Doesn’t seem like it should be that difficult, but I had so much trouble!!!

I chose to use Amy’s slow-moving recipe and the fragrance Bite Me from Nature’s Garden, a combination that I’ve found to be incredibly easy to work with in the past. In fact, I’ve used this same awesome duo in a few of Soap Challenges: the spin swirl, the tall skinny shimmy, and the circling Taiwan swirl (the Satsuma batch). And with great success each time! So what happened with this teardrop technique?

For my first attempt, I used a regular loaf mold, soaped at room temperature (about 73 degrees), and added some goat milk powder and colloidal oatmeal to the oils. Mad Oils is the sponsor of the Club this month, so I chose to use their lovely micas as colorants, mixed with water. I began mixing the oils and lye, pulsing and stirring, being patient and going slowly to try to find that perfect trace. I was careful to stop and poured off a bit of soap into 5 cups, but I soon discovered that my little 3 ounce paper cups weren’t quite big enough! I had a difficult time mixing up the colors without splashing them all over the place, and this took longer than I’d anticipated. By the time I poured the main batter into the mold, I could tell I was in trouble. It was already at a medium to thick trace. I tried to work quickly to pour the colored stripes down the center, but they were setting up as well.

IMG_1958

Definitely too thick! And I “poured” too much soap for each stripe too.

When I got to “pouring” the main batter down both sides, it was more of a spoon plop to get it in. As suspected, I did NOT end up with a teardrop, but more of a triangle.

IMG_2087

Mount Vesuvius in multicolor!

I did a Taiwan swirl on top with the remainder of the colors, and it makes a lovely eruption coming out of the volcanoes.

IMG_2089

A few bars only partially gelled, too. A framed view of the volcano!

Batch #1: FAIL. But, it’s still soap, smells good, and looks kind of cool if you didn’t know that I was aiming for a teardrop.

Second verse, same as the first. Mostly. I chose a tall skinny mold instead of a loaf, but used the same recipe, same fragrance, same additives, and Mad Oils micas again. I changed up the order of the micas, used a different blue and pink, and added an orange rather than a red, but those small changes shouldn’t have affected the behavior of the soap. This time, pink was the base color. Again, I slowly and carefully stirred and pulsed my blender, waiting for the perfect consistency. I stopped just shy of trace, hoping to be able to work with it longer before it set up. I poured off the colors into 5 ounce paper cups this time and stirred as quickly as possible, but I was still pretty messy here. (I need to find some of the tiny whisks that Amy used in her tutorial! Spoons didn’t work nearly as well.) Just like in my first attempt, by the time I poured the first layer, it was pretty thick. I only poured in one stripe of each color and needed to add in more pink up the sides. No pictures of the pour this time; not enough time! I knew it was too thick already, so what’s a girl to do? I still had quite a bit of colored soap left in the cups. Never without hope, I thought maybe with lots of stirring to loosen it up, I could pull a teardrop out after all by trying a second pour. But I was wrong.

IMG_2094

What is this? Definitely not any teardrops in there!

The stirring didn’t really help, and I just ended up with 2 weird multicolor spots in the middle of a pink soap.

IMG_2098

Is that a platypus on top? Or maybe a lizard-like creature?

And to add insult to injury, I used too much water in the yellow and orange micas and apparently didn’t stir it up well enough. As I was pouring those colors, I found a few pools of water in the soap! They broke through the other colors and layers, and upon cutting the soap, the extra water seeped out.

IMG_2096

A few bars have holes and pocks in them.

Yuck! At least my girls love this fragrance. They’ll have fun using the hole-y soap!

By the third attempt, I decided to blend just to emulsion. Same recipe, same fragrance, same additives, same micas as the second batch, tall skinny mold, and again soaped at room temperature. I switched up the order of colors (just to be able to quickly identify which batch was which). Just like the previous two tries, my soap batter set up quickly as I mixed in colorants, and I knew I wasn’t going to find a teardrop. After the first round of striped pours, the soap was spreading out to the edges of the mold, so I added a little bit of green base soap. Then I quickly poured another round of stripes and added more green. I still had quite a bit of colored soap in my cups, so I spread out thin layers in rainbow order on top of the mold…a poor attempt at a salvage, but I knew it would still be interesting to look at and result in a usable soap.

IMG_2080

Rainbow huts with rainbow smoke coming from the chimney!

Haha! Nope, no teardrops here.

IMG_2083

A lovely row of houses, yes? My entry for the Challenge Club!

Batch #3: FAIL. Still no teardrops.

Since I wanted to at least make an entry, I’ve decided to go with this last row of houses. Not a teardrop in sight, but perhaps others can learn from my many mistakes!

With all of the end-of-school activities and craziness around here, I haven’t been able to try to make any more teardrops. I was hoping to try some new batches with no additives, but alas, it’ll have to wait a week or two. I’m interested to see what may be causing the faster than usual trace with this slow-moving recipe that I’ve used successfully time and time again. There must be a scientific explanation for this, and I’m determined to figure it out! It’ll just have to be after the Challenge Club closes. Anyone out there have any input? I’ve seen that several other soapmakers had a rough go with this technique just like me. I love that we can pool our collective experiences and knew knowledge and come up with some answers!! Another of the many reasons that I LOVE this Club! Thanks so much, Amy, for putting it all together. I’ve haven’t participated in the last few months, and I’ve really been missing it! Now I’m looking forward to finishing up the school year so that I can take the time to read everyone else’s experiences.

Circling Taiwan Swirl Soap Challenge

What do you do when it’s below zero and snowy outside? I can’t think of anything more fun than making soap! Well, actually, traveling to some exotic and WARM location might be more fun…but if I have to stay home, soap it is!! So this month’s Soap Challenge Club was a welcome activity. I’ve done the Taiwan Swirl many, many times, and the results are always beautiful. (You can see some previous Taiwan swirls here and here.) But I always free-hand pour the soap that I swirl, and I only pour the soap one layer thick in a slab mold. This Circling Taiwan Swirl soap really did present me with challenges!

First of all, I don’t have dividers for my soap molds. I made some dividers out of foam board and covered them with packing tape in hopes that the soap would easily slide off of them. I also made them to fit very tightly in my molds, with hopes that they’d stay put as I poured the soap. I was wrong on both accounts! And furthermore, because I had to cut the edges and tape them up, they weren’t perfectly straight edges that sat flush on the bottom of the mold, so some soap seeped through as I poured. In fact, nothing about the dividers was truly straight! Take a peak:

20160119-IMG_1144

Clearly, these dividers are far from perfect!

Overall, the dividers were my nemesis in this challenge! I’m sure that the lovely (and straight!) dividers that you can purchase are probably well worth the cost if for no other reason than to avoid all the frustrations that I had.

My next challenge was the universal soap-making challenge: trace. I was testing out 3 new recipes (which I realize is not the brightest idea when making a challenge soap). I found that my recipes probably contained a bit too many hard oils and butters, and probably too much castor oil, so all 3 recipes set up really quickly. I was scrambling to get the soap colors mixed and poured quickly, and then I fought my silly dividers like crazy! Even with blending the oils and lye at 85 to 90 degrees and only blending to emulsification, the soaps were still thick by the time I finished pouring them.

Soap #1: Lavender Fleur fragrance oil from thesage.com with titanium dioxide, lavender oxide, black oxide, and green mica as colorants. I also added lots of goodies like yogurt, colloidal oatmeal and silk to the batch.

20160119-IMG_1148

Yikes! SO THICK!

By the time I poured the soap and fought the dividers, it was difficult to swirl the soap. I started out with a skewer to create the first swirl, but then switched to the handle of my plastic spoon to circle around the outside.

20160119-IMG_1162

It was so thick that it didn’t swirl much.

Soap #2: Black Raspberry Vanilla fragrance oil from Nature’s Garden with titanium dioxide, red mica and lavender mica blended, and black oxide, also with yogurt, colloidal oatmeal and silk. This fragrance typically gives me lots of time to work with the soap, but I fought the dividers again and ended up with thick soap. I used my spoon handle to swirl the entire soap this time.

20160119-IMG_1154

Another thick soap that didn’t swirl as much as I’d have liked.

Soap #3: Pixie Dust fragrance oil from thesage.com with Mad Oils micas in blue, pink, yellow, and purple. I included milk and yogurt in this batch along with silk and colloidal oatmeal. I added extra liquid to this batch in hopes that it wouldn’t set up as quickly, but it did exactly the same as the first 2 batches.

This soap was thick too, but I liked the swirls more here.

This soap was thick too, but I liked the swirls more here.

After these 3 frustrating batches, I gave up for the day and came back fresh the next. I decided to go with the tried-and-true slow moving recipe that Amy gave us in several of her tutorials throughout the Soap Challenge Club years. It works like a charm every time! And I love the feel of the soap after a good long cure.

Soap #4: Satsuma from Wholesale Supplies Plus with Mad Oils micas in pink, orange, and yellow as well as an uncolored stripe. I included milk and yogurt in this batch with silk and colloidal oatmeal. I still fought my dividers, but this time the soap was nice and fluid the entire time I poured. This fragrance is so incredibly yummy, and I really think it slows down trace. It’s a soaper’s dream! I used a skewer to swirl this one nice and tightly, and I must admit, it was highly satisfying to finally get one “right!”

IMG_1174

Raw Satsuma soap with lovely wispy swirls! Yay!

I was almost dreading cutting into the soaps from the first 3 batches. I expected to find lots of air pockets since the soap had been so thick, and I didn’t know if the divider problems had wreaked havoc on the soap lines. Imagine my surprise when I cut into all the soaps and found very few bubbles and awesome results!

20160122-IMG_1251

Lavender Fleur soap. This is the end cut with the lotus flower shape in mirroring bars.

20160122-IMG_1260

Lavender Fleur bars from the inside of the log. The dividers did better than I thought they’d done. The stripes are very distinct!

20160122-IMG_1294

Black Raspberry Vanilla mirrored end cuts.

20160122-IMG_1308

These are cuts from the inside of the log. Love love love these swirls!

20160122-IMG_1279

Pixie Dust end cuts.

20160122-IMG_1287

The inside bars of Pixie Dust soap. These colors are so vibrant and beautiful, just like the fun and bright fragrance.

20160122-IMG_1236

Satsuma soap end cuts. Because this soap was much more fluid, the swirls are more feathery and there are more petals to the flowers.

Even with all of the frustrations, I am so happy with how these soaps turned out. After cutting them, my challenge has been with which one to choose to enter! I’ve settled on this soap:

IMG_1297

Black Raspberry Vanilla Lotus Soap Challenge Club entry!

Black Raspberry Vanilla Soap Challenge Club entry! It came down to the contrast of these soaps.

The contrast of these soaps was my final deciding factor. The colors really pop, and the white flower on the black background is just really pretty. 

Which one is your favorite? I made myself wait to look at everyone else’s soaps until I submitted my entry, so I’m excited to see the beautiful soaps! I’m guessing there will be lots of stunning results. I’ll definitely be making more soaps with this technique (after buying some good dividers, that is)! Thanks to Amy and everyone else who helped with this challenge technique. It was so much fun!!

Tall and Skinny Shimmy Soap Challenge

Tall and Skinny Shimmy…sounds like the kind of girl I’d like to be! The Soap Challenge Club is fun for soooo many reasons! Hehehe!

I particularly loved this month’s club challenge technique because it yields such beautifully stunning results that look terribly difficult but actually require rather minimal effort. Of course, there’s always something tricky; I mean, it is a challenge after all. And this time, it was keeping a nice thin trace throughout pouring the soap. Wait, I think I’ve said that before…? Yes? That thin trace thing seems to come up quite often!

Nature’s Garden Bite Me fragrance oil was my choice for this soap. It smells just like Zebra Stripes gum! (Does anyone remember that stuff, or is it just me???) This fruity, fun and bright fragrance makes me smile when I smell it and laugh when I read it. And you truly do want to BITE the soap! Plus I know it keeps a nice fluid soap for a while because I used it to make this previous challenge soap. My color palette included bright blue, purple, pink and orange, all micas from Mad Oils. They just scream happy!

IMG_0248

L.O.V.E. these micas from Mad Oils!!! And seriously, the fragrance name… Too funny!

Since it’s the Tall and Skinny Shimmy, we needed a tall skinny mold. Rather than making one from foam board like shown in the tutorial, I opted for using a thin flexible cutting mat. I can reuse it again and again by taping up the edges.

IMG_0239

The bottom of a Velveeta box made the perfect hold-the-edges-in-place support base!

For this fun little soap, I blended up a slow-moving recipe at about 85 degrees and pulsed my stick blender three times. That’s it! Just three little pulses and a bit of stirring, and that batter was so lovely. I was totally a rebellious student and did not weigh out all of my soaps into cups to get even pours….I eyeballed it. I was going for a gradient look, so I began with blue mica, tilted my mold on the pencil, and only poured about 3/4 of that cup of soap into the mold.

IMG_0242

First pour

Then I added uncolored batter to that blue to make it lighter, tilted my mold the other way, and poured most of that soap in. I continued this routine of tilting and pouring most of the soap, then adding the next color with each of my micas from purple to pink to orange to get a little modified portion of the rainbow. I ended up with 8 different colors total.

IMG_0244

Final pour! (I totally got engrossed in mixing and pouring and forgot to take pictures of the other 6 pours… oops and sorry!)

The incredibly awesome part of this was that the soap stayed fluid for the ENTIRE process! Just at the end, you can see that the soap was getting into a slightly thicker trace.

Unmolding this baby was like unwrapping a Christmas present. First take off the tape, then peel the paper (or mold) away…IMG_0251

And TA-DA! A beautiful tall and skinny shimmy soap is revealed!

IMG_0253

This simple little cutting mat mold peeled away from my soap so easily, too! Bonus score!

Now let’s cut it!

IMG_0255

Yeah, yeah! I see a shimmy!

The only problem: air bubbles. The bane of my existence. Ugh. But still, I am so happy with these results!

IMG_0260

If you could smell this, you’d want to eat it. Seriously! It’s screaming, “Bite Me!”

IMG_0257

Not perfectly portioned, exactly right pours, but pretty darn good.

IMG_0264

Bite Me, Tall and Skinny Shimmy. (This just sounds so mean! I don’t mean it that way, OK? Haha!)

Like always, I had so much fun in this challenge. I’ll definitely be using this technique in the future. I’m certain the other soapers in the challenge are going to produce awesome soaps! I can’t wait to see all of the lovely creations! Thank you again, Amy, for putting us all together! And thank you, Tatiana, for a great tutorial this month!

Pumpkin Perfection Soap: The Clyde Slide Soap Challenge

I just love learning a new swirl technique, especially one that comes up with great results every time, even if you don’t get it exactly right! This month’s Soap Challenge Club delivered all that with the Clyde Slide, a technique created by Clyde Yoshida of Vibrant Soap. Check out some of his YouTube videos (like this one) for a fun time! And as a bonus, you might learn more about colors and a new technique too!!

Since the weather has been changing dramatically around here, I’m once again ready for all things pumpkin. I’ve tried my hand at making pumpkin soap before, but the recipe needed some tweaking. (And a few of the soaps were massacred, too. Haha!) So, new recipe, new design.

I began by making a lye solution with 30% less water than usual (10% less to account for the extra water in the pumpkin puree, and 20% addition of yogurt). I also added a bit of sugar (for extra bubbles in the final product) and cruelty-free silk to the hot lye. I melted my oils and added pumpkin puree, a bit of yogurt, and some colloidal oatmeal to the oils. I let everything cool to about 85 degrees, then I added the lye to the oils and blended just a bit to get to emulsion (not even thin trace yet). I divided up my soap as follows: 1.5 cups of soap into titanium dioxide (white), 1.5 cups into 1.5 tsp tangerine dream mica, 1.5 cups into red oxide with a pinch of tangerine dream mica, 1 cup into cocoa powder, and the remaining was left uncolored (it was a lovely yellow-orange color thanks to the pumpkin puree and yogurt). I added a delicious spicy pumpkin fragrance to each container except the white (to ensure it wouldn’t discolor), and I whisked it in to maintain a very fluid soap.

Because of some of the spicy notes in the fragrance, I thought the soap might begin to set up, so I moved very fast! I began pouring each color into a new bowl on the opposite side of the pour spout using the faux-funnel method, alternating light and dark colors.

IMG_9583

Here’s a peak at the soap after pouring about half of it into the new bowl using the faux-funnel method.

As suspected, the soap began setting up. I used the whisk to loosen up the batter in each container so the pours would continue to be wispy, but I had to move even faster. I hesitated to stop to take a picture, but I did it for your sake!! 🙂

IMG_9584

Here’s the faux-funnel bowl just before I began pouring it into the mold.

See how set up it was already? Oh, well. Onward! And HURRY!

I began at one end of the soap mold and poured about half of the soap in, then continued pouring by moving the bowl down the length of the mold a total of 3 times. It was too thick to only pour from one end. I had to get it spread out! This is a view before I tamped the mold to flatten it out.

IMG_9585

Can you say THICK?!! And is that a bit of ricing I see??

Despite setting up so quickly, this soap clearly has some pretty awesome striations. (Nice word, huh?)

IMG_9588

Marbly… yeah, baby!

I prettied up the top of the soap, then put it to bed. I couldn’t wait to cut into it to see what cool stripes might emerge.

IMG_9600

More striations. Woohoo!

Just unmolding the soap was fun! Check out the awesome underbelly. And as a bonus, my husband passed by, inhaled long and hard, and commented that now he needs a slice of pumpkin pie. Success! Hence the name Pumpkin Perfection. Yum!

IMG_9623

Mesmerizing. Pumpkin Perfection Soap.

This soap is really beautiful, and it was really fun to make. My only disappointment is that the red-orange color turned out very close to the same color as the cocoa powder brown. In person, you can still see the slight variation, but it’s hard to capture in the pictures. Next time, I’ll try for a deeper red for a bit more contrast. Still… love, love, love the results.

IMG_9629

Every bar is completely unique.

I’m definitely going to have to make some more of this; I know it will quickly be spoken for!

IMG_9610 (2)

I like the slight feathering on these bars, and you can see some crackling white lines in there. The pumpkin and sugar probably made it get a bit hotter than usual, and I love the effect it created!

Cheers for pumpkin season!!

IMG_9618

Gotta love the zigzag stripes in this bar!

Thanks for stopping by! I’ve been participating in the soap challenges behind the scenes these last few months, and I’m happy to actually submit an entry this time around. [Maybe someday I’ll get around to posting about my soaping MIS-adventures from the previous few months. The techniques were awesome, but my creations were… less than awesome. 😀 ]

Thanks for another great Challenge Club assignment, Amy! And thanks, Clyde, for sharing your fun creations with the soaping community at large! We all appreciate both of you!!!

Ebru Soap Painting

Soap painting has always intrigued me, so I was excited to see that this month’s Soap Challenge Club is based on the art of Ebru paper marbling. After watching many, many videos of both paper marbling and soap making using this technique, my head was spinning and full of ideas!

I really like this Soaping101 video showing multiple Ebru designs, and I especially like watching the making of flowers like this. Such beautiful and intricate designs! The flowers are especially inspiring to me, and I had some delicious Apricot Freesia fragrance on hand that I’ve been wanting to use. Perfect! I looked up some photos of freesias, and this one in particular really spoke to me, so I wanted to design something similar in my soap.

I used Amy’s slow-moving recipe, adding a bit of sugar to the lye for a bubblier lather, as well as some milk, colloidal oatmeal, and silk for their luxurious benefits. Colorants included activated charcoal, titanium dioxide, green mica, yellow oxide, and blue oxide. My goal was to set a leafy backdrop with dark grays and greens, and then to make some white flowers with yellow accents.

First, I poured gray soap into the mold, and then I added drops of two different green colors, as well as a few drops of black and yellow for contrast.

IMG_8574

Adding green soap to the gray base.

IMG_8585

Making some leafy swirls as a marbled backdrop for freesia flowers.

Using a skewer, I made long strokes down the entire length of my mold, back and forth in an attempt to make leaves of tall grass. I learned from this that less is certainly more. I added too much soap, too many drops, too close together.

Next, I added pools of white, trying to fit one flower into the space for each bar of soap in this 9-bar Brambleberry slab mold.

IMG_8589

I was a bit overzealous with my pouring!

Next came some yellow spots for accent coloring inside the flowers.

IMG_8593

Again, overzealous with the pouring!!

My husband lovingly noted that it looked like eggs over easy. Yep. The super un-appetizing kind!

The last step was to turn the eggs into flowers. Hopefully.

IMG_8596 (2)

First flower is pretty! Yippee!

Since the soap was still very fluid, the white soap that I dropped on top spread more than I anticipated, especially after I added the yellow, so I didn’t have a lot of room to play. My “backdrop”  ended up mostly covered, and the flowers… well, they’re not the prettiest flowers I’ve ever seen. Haha!

IMG_8602

Apricot Freesia raw soap

It smells wonderful, and I’m sure it’s going to be lovely to use, but I’m a bit disappointed. It’s not what I was envisioning, but it’s not the worst I’ve ever made either!

IMG_8608

Here’s a closeup of some flowers that shows the detailed marbling of the background base soap. It’s not that “leafy,” but it’s pretty nonetheless.

I’m ready to have another go at creating more flowers in soap. If I’d given myself more time, I probably would have made another soap to submit for my challenge entry. BUT, such is life with a nursing baby and five littles running around on summer vacation! I’m happy to be participating at all!!! 😀

The great thing about the Ebru technique is that the design possibilities are absolutely endless. In fact, many of the other designs that I’ve used in soap probably originated with this ink marbling technique. It’s going to be fun to see all of the other members’ soaps this month! Thanks for another fun soap lesson, Amy!


Spinning Swirl Soap Challenge

Where does the time go?

Oh, I know. To crying babies and messy toddlers and mounds of laundry and mouths that always seem to need to eat…! So, I skipped out on last month’s landscape Soap Challenge. The reality of sleep deprivation had set in hard core, and mama needed a break! But all the soaps were soooo awesome! I’m inspired to try a soapscape. Someday. It’s on my [neverending] list.

Now that sweet Violet is 2 months old, we’ve settled into a good routine. (She’s even already sleeping 8-10 hours a night!!! WAHOO!) And I simply could not miss this month’s Spinning Swirl Soap Challenge Club. These soaps look so cool, and I love learning new-to-me techniques. With this one, you make soap using at least a few colors, leave it in a nice fluid state, pour it in the mold, and then spin the mold. Sounds easy enough I suppose. I had no idea that you just spun the mold! No idea! How have I missed out on this technique? So clever and seemingly so simple.

The real challenge for me was the soap consistency. Let’s be completely honest here: soap consistency is always the biggest challenge, no matter what the design is. For me, at least. How about you, my fellow soapers? Getting the perfect trace for the perfect design, that’s the hardest part! Soap is so fickle. Temperatures, additives, fragrances, and oils all make such a huge difference in how quickly soap sets and changes.

I decided to use the slow-moving recipe that Amy has kindly shared for several of our challenges, one that I’ve used for several soaps now, like this one and this one. The recipe is 35% olive oil, 30% lard, 25% coconut oil, and 10% rice bran oil (or another light vegetable oil like avocado). It’s a lovely recipe, and I like to boost it’s bubbliness by adding 1 teaspoon of sugar per pound oils to my lye water, as well as 1 teaspoon of sodium lactate per pound oils to make a harder bar. To this batch, I also added some powdered goat’s milk, silk, and colloidal oatmeal. I also used a fragrance oil that I’m familiar with that doesn’t speed trace, one that just makes me laugh: Bite Me from Nature’s Garden. It’s fruity and fun, and it really does make you want to bite the soap! It kind of smells like citrusy chewy candy with a hint of strawberry and other yummy goodness. You know that smell that hits you when you walk into a candy store? Kind of like that. It’s playful and lends itself to using lots of bright colors.

Prep was really important for this technique as well. I had all of the colors, whisks and spatulas ready and waiting before I began making the soap. {For the other soapmakers out there: I used Bramble Berry’s 9-bar slab mold without its dividers since I wanted to cut the soap both vertically and horizontally. It took 46oz oils to make the soap 2 inches deep, and I actually cut it into 14 bars, 12 cut horizontally and 2 big end chunks.} I stole the lazy susan that I use for my spices from my cabinet, and I set my mold right on top of that.

With my workstation ready, I very carefully blended my lye and oils at low temperatures (around 80 degrees), and I slowly pulsed and stirred them to ensure a loose batter that was right at emulsification. I quickly divided the batter into 7 separate containers of about 3/4 cup soap each: blue mica, green mica, gold mica, coral mica, stained glass red pigment, lavender oxide, and titanium dioxide. Almost a rainbow!

IMG_7690

Nice fluid soap ready to pour!

I quickly poured different colors in 6 different spots in my mold using a faux-funnel technique. To get very thin lines of color, I only dropped in a very small amount with each pour, which took quite a bit of time. By the last few pours, the soap was starting to set up. I whisked each color before pouring it to try to keep it fluid, and I was working furiously fast to try to get it all in and spin it!

IMG_7692

Those last few pours were very messy!

I pounded the mold a few times to get out the air bubbles and settle the soap flat. Then I began spinning! So. much. fun! But to my great surprise, I realized that the spinning wasn’t really what made the soap move. It was the stopping. Duh. Abrupt stops. That’s the key! I spun several times and paused for a photo.

IMG_7693

Half way through spinning!

Then I kept spinning and stopping some more. I was pleasantly surprised at how fluid the soap still was in the mold. When the lines were very thin, swirled, and starting to look kind of like a crazy-colored marble, I decided to stop. No sense in making a muddy mess of those pretty colors. But I tell ya, I could have kept spinning! It really was fun.

IMG_7694

Spinning complete!

IMG_7699

Especially around the edges, you can see the marbling effect. I was worried if I went any further, those fine lines would start to get muddy, so I made myself stop. Just pretend there are no air bubbles…

After impatiently waiting for a day (I looked at the clock constantly and forced myself to wait 24 hours), I unmolded. The glory of unmolding and cutting fresh soap!

This is the first vertical cut.

IMG_7708 (2)

Look at the pretty swirls!!! I’m smiling (even though I messed up my cut a bit)!

And here are the horizontal cuts.

Bite Me Soap

Bite Me soap made with the spinning swirl technique.

Bite Me soap

Does the spinning make you dizzy? 😀

I’m surprised that the soap didn’t swirl more in circles since I poured in 6 different places in the mold. I expected a few more swirls. But I love the thin lines throughout each bar. So much visual interest all around. And the smell. Yum!

Bite Me soap

So much visual interest all around every bar!


Once again, Soap Challenge Club success! Learned a new technique. Had fun. Met more awesome soapy friends. I’m a happy girl! Thanks, Amy! 😀

For the Love of Violet: February Soap Challenge

I have a confession to make. There’s a new love in my life.

Her name is Violet.

20150219-IMG_6760

Violet Rae, our sixth baby girl

She’s less than 2 weeks old, under 10 pounds, and is delectably squishy. You can see some more totally adorable photos here. 😉

Seeing as I’m so enamored with Miss Violet, she’s my inspiration for February’s Soap Challenge Club! And because she’s part of my very DNA, what better technique to use than this month’s challenge, the DNA Helix swirl!?!

I chose to use Nature’s Garden Loving Spell fragrance oil since I seem to be under her spell! It’s sweet, juicy, sparkly, fresh, and intoxicating, just like my Violet. And of course, I used shades of violet to create the soap. Because she’s got the softest, most sensitive skin, I added nourishing ingredients to the soap like tussah silk and colloidal oatmeal. I also added 2 teaspoons of sugar to my lye solution (in the form of a simple syrup) to add bubbles, as well as 2 teaspoons of sodium lactate to add hardness to the soap. Amy’s slow-moving recipe of 35% olive oil, 30% lard, 25% coconut oil, and 10% rice bran oil proved to be ever-so-slow-moving indeed! And the fragrance oil was a breeze to work with; no acceleration or ricing at all. I mixed my lye solution to my oils and fragrance at around 110 degrees, and I had well over half an hour of very fluid soap to play with.

After emulsifying the lye solution and oils, I split the batter into 4 equal parts and colored them with the following: 0.5 tsp lavender oxide, 0.5 tsp lavender oxide and 0.25 tsp black oxide, 2 tsp titanium dioxide, and 2 tsp sparkle gold mica, all dispersed in water.

20150220-IMG_6785

Left to right: deep purple, sparkly gold, lavender, and white soaps

After mixing in the colorants, I poured each color in long s-shaped curves down the length of my smallest slab mold. I filled the entire mold with soap this way, so there should be interesting details throughout each bar. As I neared the final pours, I was sure to carefully make lines to reveal all 4 colors.

20150220-IMG_6784

All soap poured into the mold and ready for swirling

I then inserted a skewer to the bottom of the mold and made very tight s-curves perpendicular to the stripes.

20150220-IMG_6790

The first round of swirling was so beautiful that it was difficult to make myself keep going!

Finally, I made the DNA Helix curve design, again going perpendicular to the stripes I’d just made.

20150220-IMG_6801

DNA Helix swirl design in Love Spell soap. Can you see the helix? Pretty awesome!

The results are stunning! This is a beautiful design technique that I will definitely use again.

20150220-IMG_6793

Love Spell soap in the raw

Since Miss Violet made her appearance, I’m busy trying to find a new normal. I haven’t made any soap until now. In fact, I cut this challenge very close and made this soap late last night! It’ll be in the mold for another day, and I’ll have to post pictures of the bars sometime next week.

20150220-IMG_6811

Here it is with dividers in place. Every bar will be so unique!

I’m excited to take a peak at all of the other soapy entries this month. (I made myself wait to look until after I’d made my own!) I’m certain we’ll have some incredible works of art like usual. Thanks, Amy, for another great tutorial! 🙂

Introducing Our Sixth Messy Baby!

We are so incredibly blessed to introduce to you our sixth messy baby girl!

Meet Violet Rae!

20150214-IMG_6671

Violet Rae

Miss Violet was born just over a week ago at the healthy weight of 8 pounds 6 ounces, our biggest baby yet. She’s absolutely perfect in every way with deep blue eyes, lots of dark hair, and delicious cheeks!

20150216-IMG_6710

Precious baby feet

As anticipated, her sisters can’t get enough of her!

20150212-IMG_6604

The triplets are especially fascinated with this new little person!

They constantly give kisses and want to hold her. So far, Lydia (our 2-year-old) has shown no signs of jealousy. The excitement of the bigger girls has rubbed off on her, and she, too, gives constant kisses.

20150209-IMG_6557

Lydia holding Violet for the first time. And Lydia suddenly seems so big!

We’ve captured many of Violet’s sweet sleepy smiles already.

20150214-IMG_6692

Smiling in Meemaw’s arms

And I’ve been having fun setting up photo shoots at home! 🙂

20150216-IMG_6739

Violet at one week old

20150216-IMG_6718

Violet in a violet tutu! 🙂

Yes, the baby messes have begun once again! And not only do I have several loads more laundry each day (how exactly does that happen with the addition of one tiny little person?), but Lydia has also decided that she’s a big girl now, ready to potty on the toilet. She noticed that the baby wears diapers, and she’s not a baby anymore! Translation: Now I have lots of toddler messes to clean up too! She’s doing well with it really, but there have been lots of little accidents here and there to mop up. Oh, the stories I could tell… Six messy babies keep this mama hoppin’!!! And, boy, do I look forward to this:

20150214-IMG_6645

Sweet sleep

In all seriousness, Violet is another miracle to us, a testimony that God is actively involved in our everyday lives. (Check out a little bit of our infertility history here to see what I mean!) SIX GIRLS SIX AND UNDER! Who would have thought?! No, it’s not all sunshine and roses; we’re tired and busy, and Violet can cry with the best of them. But in the midst of it all, I’m trying to enjoy every cuddle, each sweet baby sigh, and all the tender sibling moments. We’re so very thankful for our newest addition, for this precious family that God has given us.